- /
- /
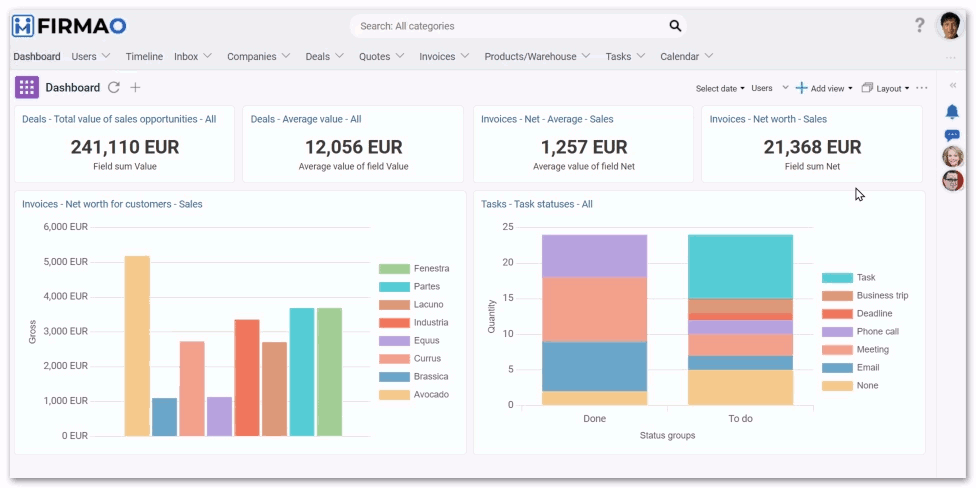
Dashboard
In the Firmao system, you can configure your own dashboards. Dashboards are the view that appears first after logging into the system. They let you quickly check, among others: company’s financial results, number of new companies or deals analysis.
Tip: The user sees on the dashbord only the items they have been authorized to view. Any user can define more than 1 dashboard, and switch between them.
Customizing your dashboard
To configure your dashboard, click on “Dashboard” module in the main menu, and then click “+ Add view”.

When adding a new view, define:
- list (e.g. Companies, Invoices, Deals);
- filter;
- view, i.e. analyzes recorded on charts or lists of given objects (available for Enterprise and Supreme licenses).

To save the entered data, click the blue “Add” button in the lower right corner of the window.
How to add a new dashboard?
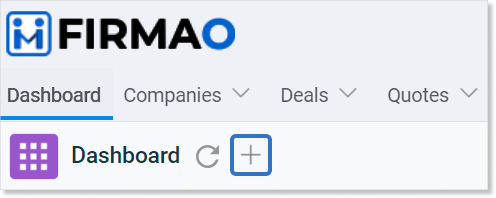
By default, a demo account has one dashboard. To configure a new one, select the “Dashboard” module in the main menu, and then click the plus icon in the upper left corner of the window.
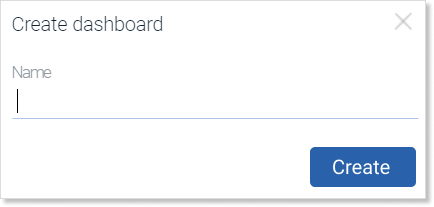
The “Create dashboard” window will open, where you can enter the name of the new dashboard.
The configuration of the new dashboard will be the same as in the instructions above.
How to rename and delete the dashboard?
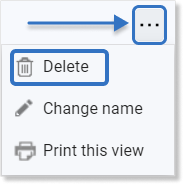
To change the dashboard name, click the three dots icon in the upper right corner of the screen. Select the “Change name” option from the drop-down list.

To remove the dashboard, click the three dots icon in the upper right corner of the screen and select the “Delete” option from the drop-down list.
Dashboard functioning
In the upper right corner of the dashboard view there are functions with which you can:

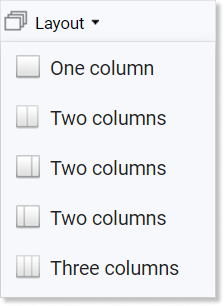
- change the layout of views on the dashboard (function “Layout”);
- narrow the period of displayed data (function “Select date”);
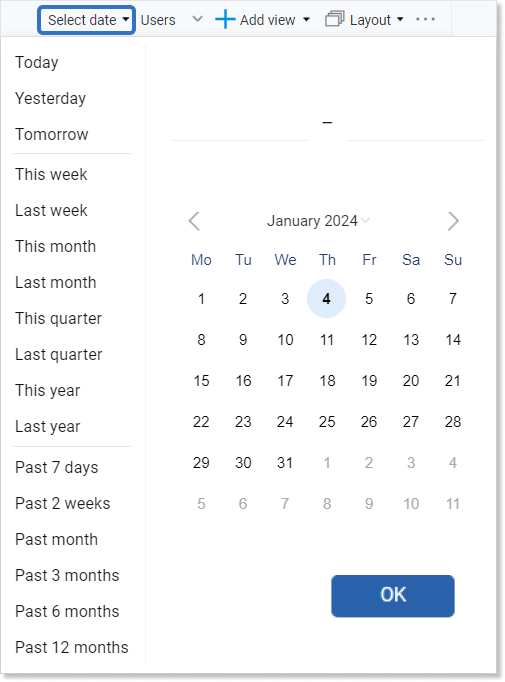
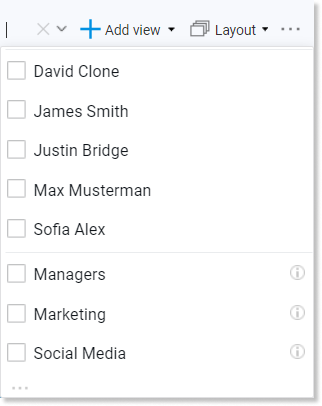
- filter data by selected users (function “Users”).
You also have the option to print the dashboard. To do this, click on the three dots icon in the upper right corner and then “Print this view”.

How to arrange views on the dashboard?
In the Firmao system, you can freely arrange views on the dashboard.
To do this, click on the name of the view you want to move and, without releasing the mouse button, move it to any place on the screen, and then release the mouse button (drag & drop method).
How to modify the view on the dashboard?
To modify the dashboard view, hover your mouse over it. Function buttons will appear in its right corner.
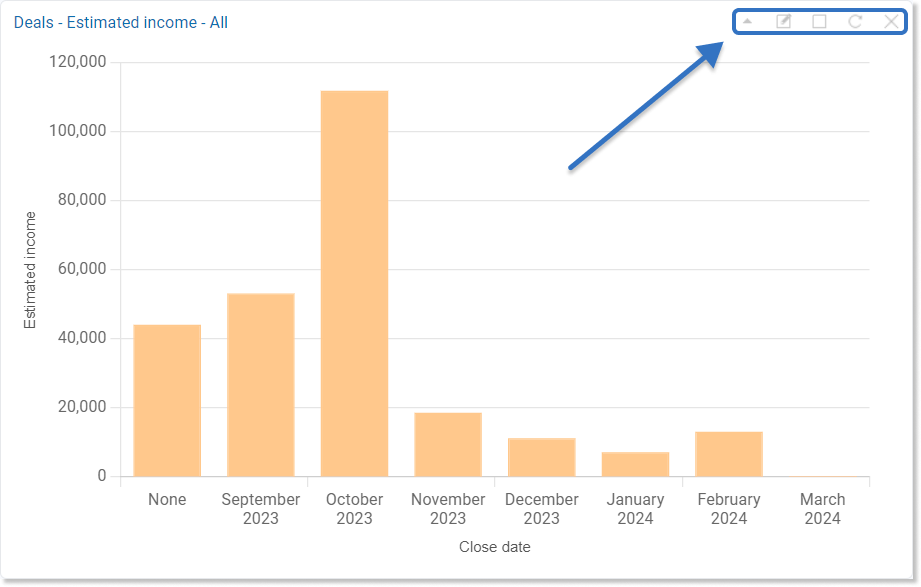
With these buttons you can:
- Collapse panel (arrow icon) — this will narrow the view and prevent it from being previewed;

- Edit the chart (pencil in frame icon) — appears only when the view is in the form of a chart. After clicking it, you will be taken to the chart editing view, where you can change the displayed data;
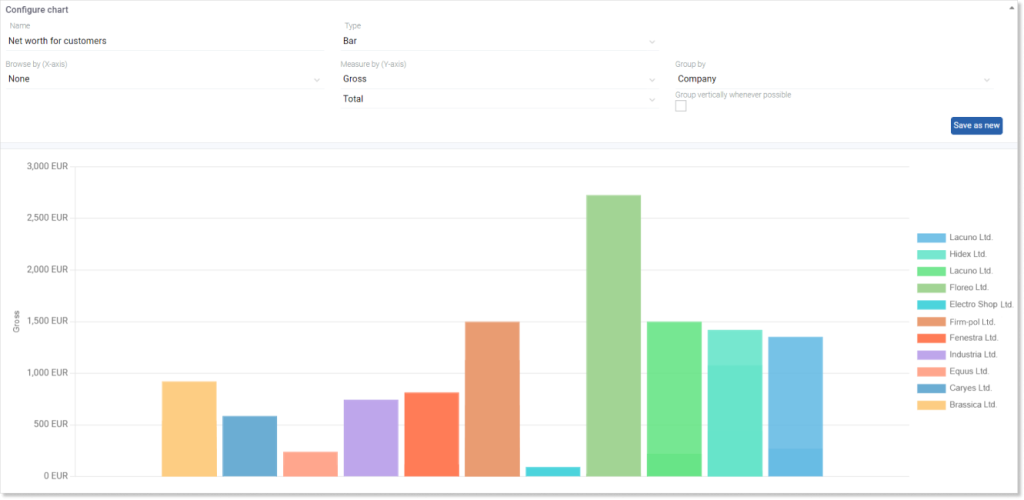
In the chart configuration window you can specify:
- chart name;
- chart type;
- browsing and measuring the chart according to (…);
- grouping data according to more precise parameters;
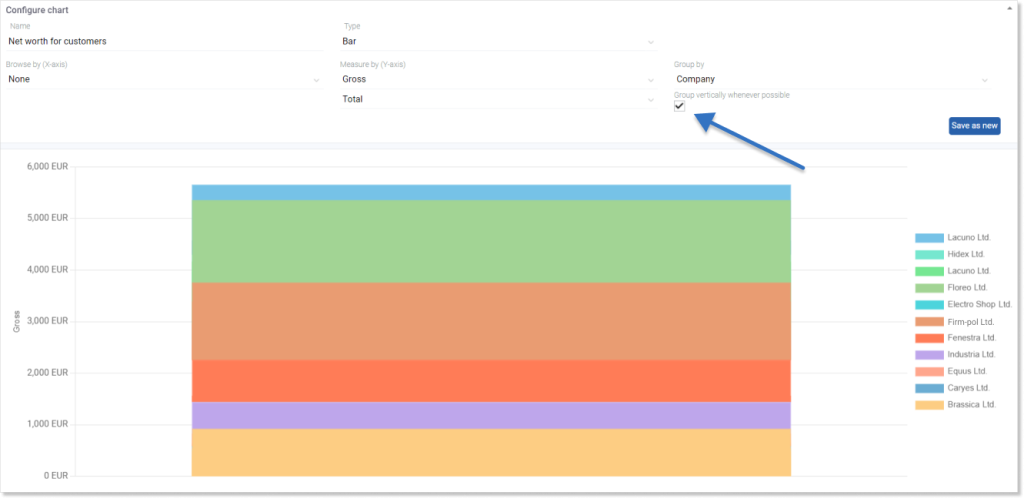
- grouping data vertically when possible.
Grouping data vertically is an option that allows you to display data in one bar.
- Maximize (square icon) — will transfer you to a given module and enlarge a given view with the possibility of its configuration;

Clicking on “Configure chart” in the upper left corner will open editing options analogous to those in the chart configuration window on the dashboard.
- Refresh (curled arrow icon) — allows you to refresh the view to obtain the most up-to-date data;
- Close (X icon) — deletes the view from the given dashboard.