- /
- /
Adding tasks
In the Firmao system, we can add any tasks in which we will be able to describe the work that will be performed by the employee or employees assigned to them. We can determine the exact time of its implementation, provide priority, or determine whether a given task must be started or finished until a specific time. Thanks to the reminder option, the system will email employees assigned to the task with information about the planned start date, e.g. in the case of a scheduled meeting.
Important! We can receive reminders in our mailbox after setting them in the task. For the system to send them to us in the form of an email, we must enable the option “Email notifications”. It is located in “User Settings” after clicking on the avatar.
How to add a task in the Firmao system?
We can add a task both from the task list view and from the details of a given object, e.g. a company, which will automatically assign a given task to a given company.
To add a task from the task list view, we must go to a given module from the menu. Then we need to click the green “Add” button in the upper right corner of the view.

A new task creation window will appear. We can define in it:
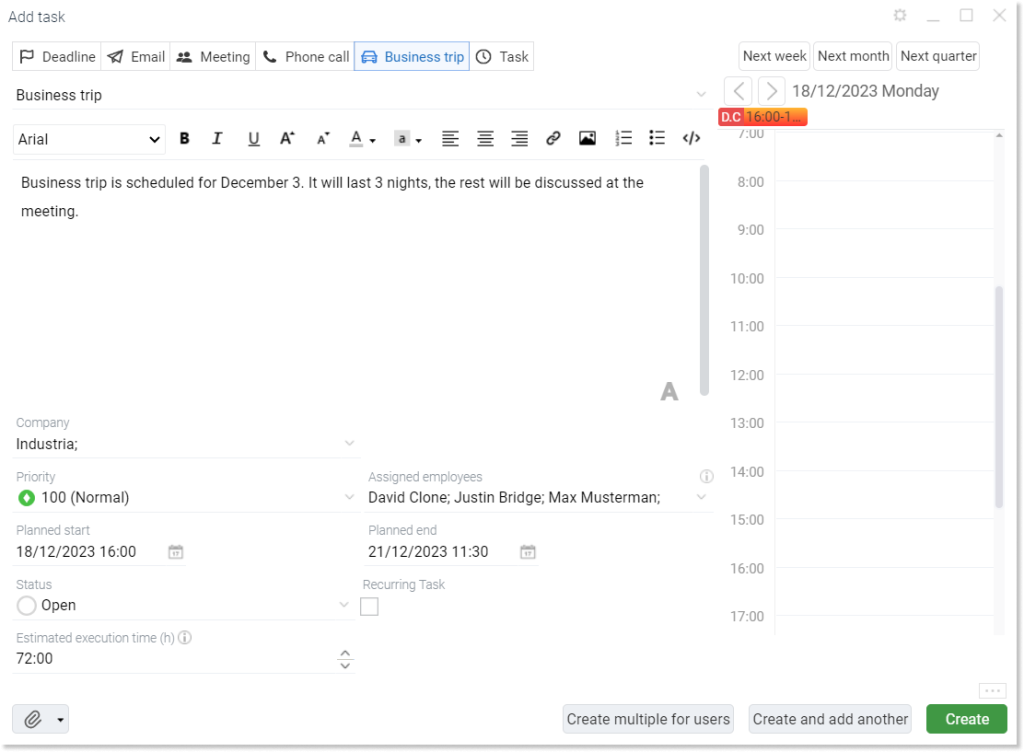
- Task category — selecting from the available ones (Deadline, Email, Meeting, Phone call, Business trip, Task)
- The name of the task — we can briefly describe what the task will involve,
- Content of the task description — we can write the details of a given task, e.g. the steps for its implementation or the goals we want to achieve with it,
- Company — which company the task is associated with,
- Priority — allows us to set tasks according to how important they are for the company,
- Deal — which deal the task is associated with,
- Assigned employees — we determine people who will perform given tasks,
- Planned start and end — we define when a given task is scheduled to start and end (after selecting these dates, we will be able to add a reminder date),
- Task status — we define the status of a given task, e.g. whether it is open, closed or paused,
- Contact persons — allows us to specify who people assigned to a task can contact about it,
- Estimated execution time — calculated automatically based on the entered planned start and end of the task; however, without completing these two fields, we can manually enter the planned execution time.
Each task can be assigned to any number of employees at once, and each employee can be assigned to any number of tasks.
Tip: On the right side of the task creation window there is a calendar that will display other planned tasks for a given day. More information about the calendar can be found here.
When we fill in all the fields we need in the adding a task window, we need to click the green button “Create” button in the lower right corner of the creation window.
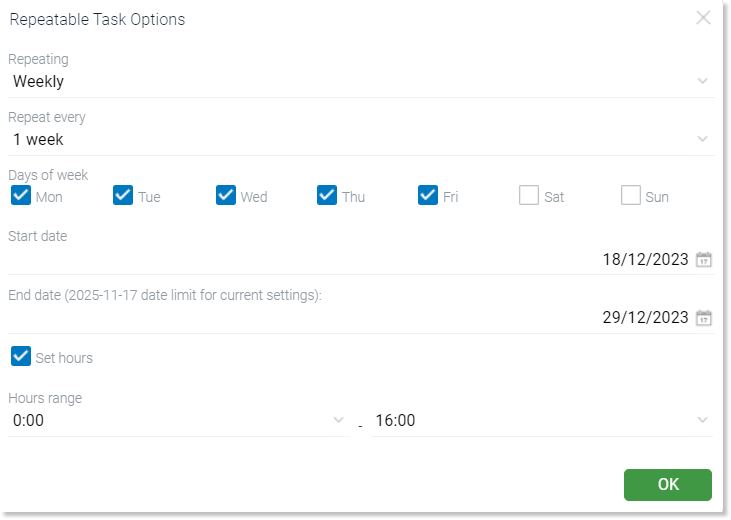
How to create a recurring task?
In the task creation window, we can also set it as recurring. To do this, we need to check: “Recurring task” and then a creation window in which we can define the repeatability of a given task will appear.
How to hide fields in the task creation window?
In the task creation window, we have many available fields when creating a task, but some of them may be unnecessary for us. We can manage their visibility. To do this, click on the gear icon located in the upper right corner of the creation window. Then we need to click “X” next to the field we want to make invisible or pin icon, if we want to make a given field visible.
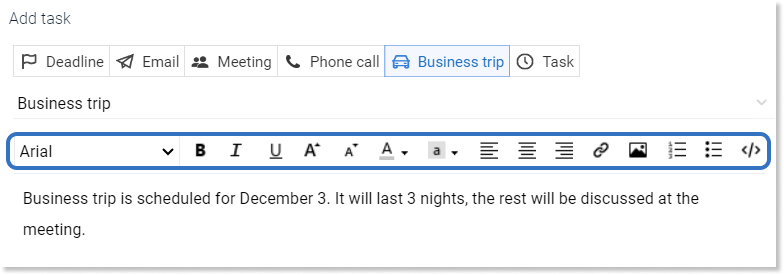
Description content editor
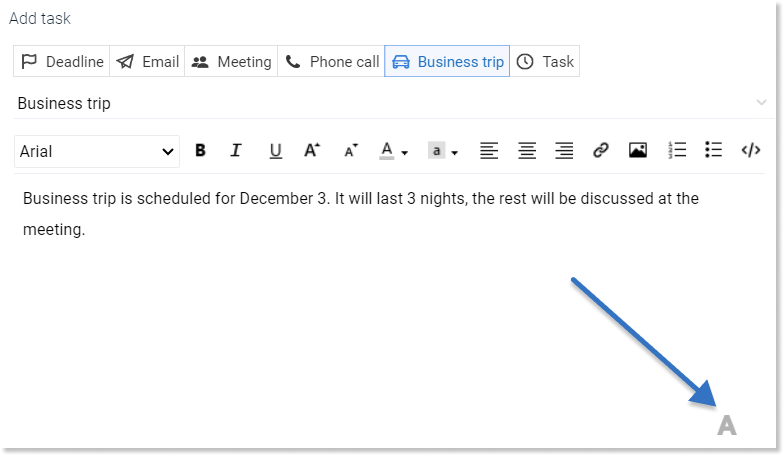
In the system, we can modify the appearance of the content of the task description, i.e. we can highlight the text, bold it or insert a list. A toolbar (WYSIWYG editor) is visible in the task creation window.
We can edit the content of the description using the functionalities available in the toolbar. These include:
- Font type
- Bold
- Italics
- Underline
- Grow and shrink the text
- Font color
- Highlight
- Text alignment
- Hyperlink
- Inserting an image from a web address
- Numbered list
- Bulleted list
- Source Editing (Switching to Source Edit Mode)
- Formatting (HTML)
If the toolbar is not visible, click on the “A” icon, in the lower right corner of the task content.